Ankle Syndesmosis Injury Intermediate Exercise Programme
Aim to perform this programme a minimum of once per day unless prescribed otherwise. As with any new exercise, start slowly (repetitions as able) and build up as you are able within the guidelines below.
Pain should not exceed 4/10 whilst completing this exercise programme.
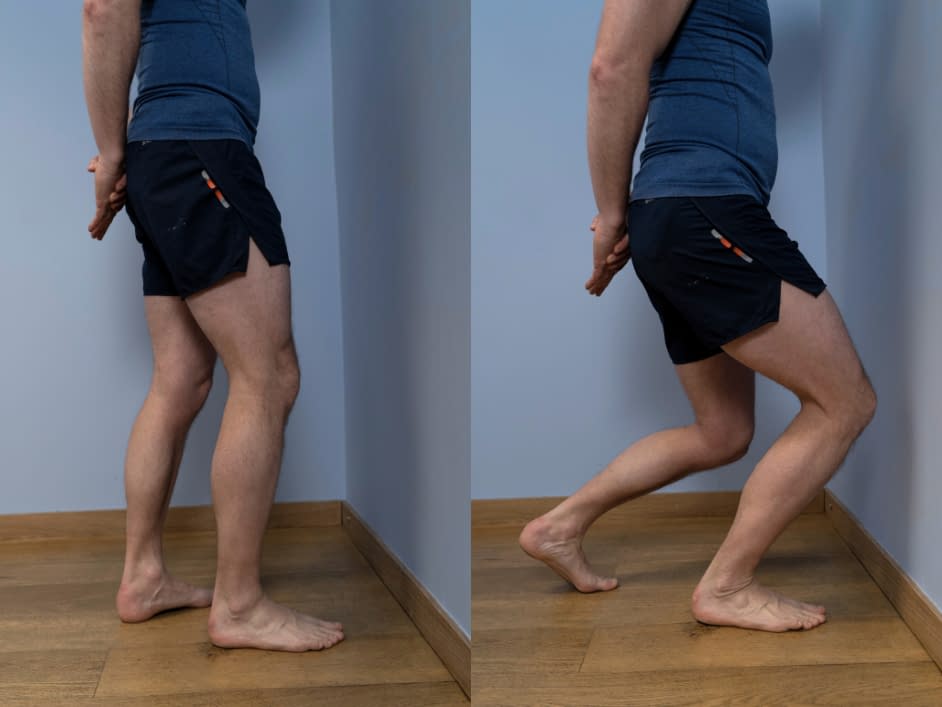
1. Knee to wall
- In standing, face a wall where you can access the skirting board with your legs.
- Place the affected toes of the affected leg agains the skirting board.
- Keep the whole foot flat on the floor and push your knee towards the wall by bending the ankle.
- Push your knee forwards until you feel resistance at the front of the ankle joint which you should feel just before your heel starts to come up off the floor.
- If you can reach your knee to the wall easily, start with the toes slightly off the wall.
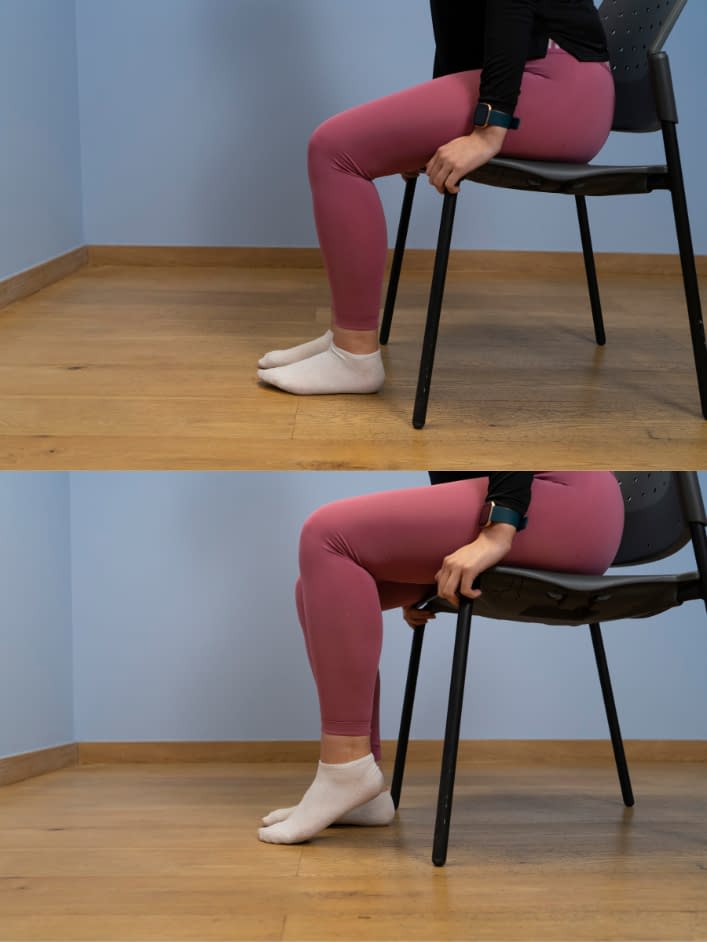
2. Seated heel-to-toe
- Sit with your feet flat on the floor, knees bent.
- Rise up on your tip toes and hold for a count of 3 seconds.
- Lower back down to feet flat and then lift the toes and front of the feet up, bending from the ankles and keeping the heels in contact with the floor – hold for 3 seconds.
- Return to feet flat and repeat.
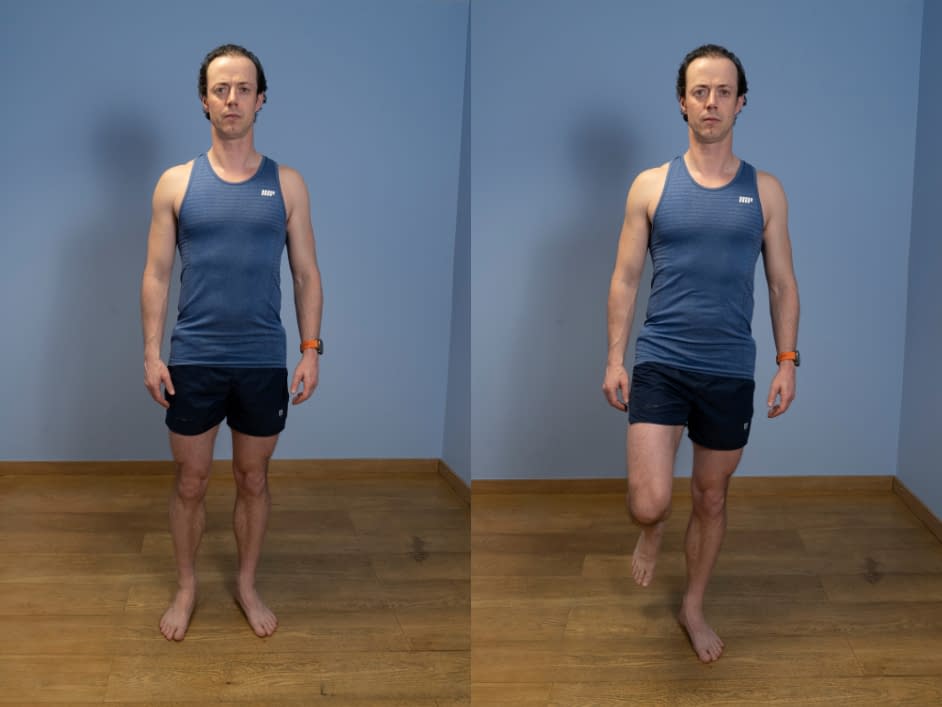
3. Single leg balance - knee straight
- Perform this exercise barefoot or in socks, in a clear space near a wall/stable object and on a flat, non-slip surface.
- Shift your weight onto the affected leg then lift the supporting leg slightly off the floor – keep the knee straight.
- Look down at the knee and focus on balancing whilst keeping the knee in line with the hip and ankle – use the object/wall to prevent yourself from falling.
- To progress, try looking straight ahead rather than down at the knee.
- To advance further, this can be performed with the eyes closed.
We recommend consulting a musculoskeletal physiotherapist to ensure exercises are best suited to your recovery. If you are carrying out an exercise regime without consulting a healthcare professional, you do so at your own risk. If you have any concerns whilst completing these exercises, please contact a healthcare professional.
More Plans
Once a diagnosis of a high ankle sprain has been confirmed, you may be advised to avoid full weight-bearing on the affected joint or provided with a walking boot for 2-4 weeks to assist in managing pain, reducing swelling and promoting quicker tissue healing. Simple, isometric (static) strengthening exercises can begin in non-weight-bearing positions to start to strengthen the muscles around the joint and healing tissue. Low-level manual therapy – as guided by your physiotherapist – can help improve pain, range of movement and swelling (8).
- 0
- 1
- 2
- 3
- 4
- 5
- 6
- 7
- 8
- 910
Exercises at this stage may more closely mimic the demands of sport or physical activity and may involve more dynamic movements (plyometrics) or focus on muscle endurance. These exercises can be combined with a progressive and monitored return to play or sport, guided by your physiotherapist.
A high ankle sprain is a more complex injury than a lateral ankle injury (ligament injury to the outside of the ankle) and thus, complete recovery may take anywhere from 6 weeks to 6 months, depending on the person and the severity of the injury (9). This should not exceed more than 4/10 on your perceived pain scale.
- 0
- 1
- 2
- 3
- 4
- 5
- 6
- 7
- 8
- 910